How to customize your list settings in Flowletter
Each list in Flowletter has its own settings. You can rename the list, choose single or double opt-in, send a thank you or goodbye email, and send subscribers to pages on your own website after they subscribe or unsubscribe.
1) Login to your portal.flowletter.io account.
2) Select "View all lists" and select the list you'd like to change.
3) Select "List settings" at the top right of the list.

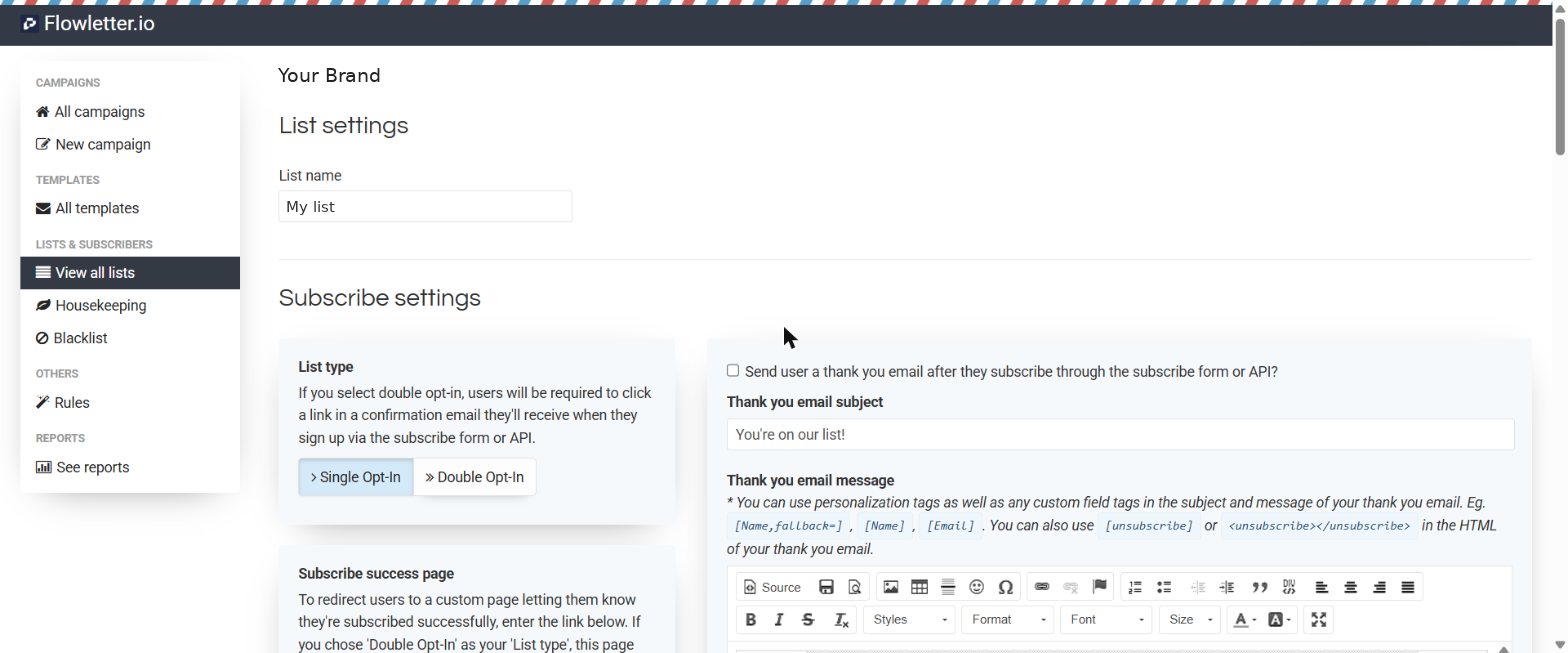
4) Update the "List name" if needed. This is for internal reference only.
Subscribe settings
List type - choose "Single Opt-In" or "Double Opt-In". With double opt-in, people who sign up through the subscribe form or API must click a link in a confirmation email before they're added to the list.
Thank you email - tick "Send user a thank you email after they subscribe through the subscribe form or API?" to send a welcome email. Add a subject and message. You can use personalization tags like [Name,fallback=there], [Name] and [Email], as well as [unsubscribe].
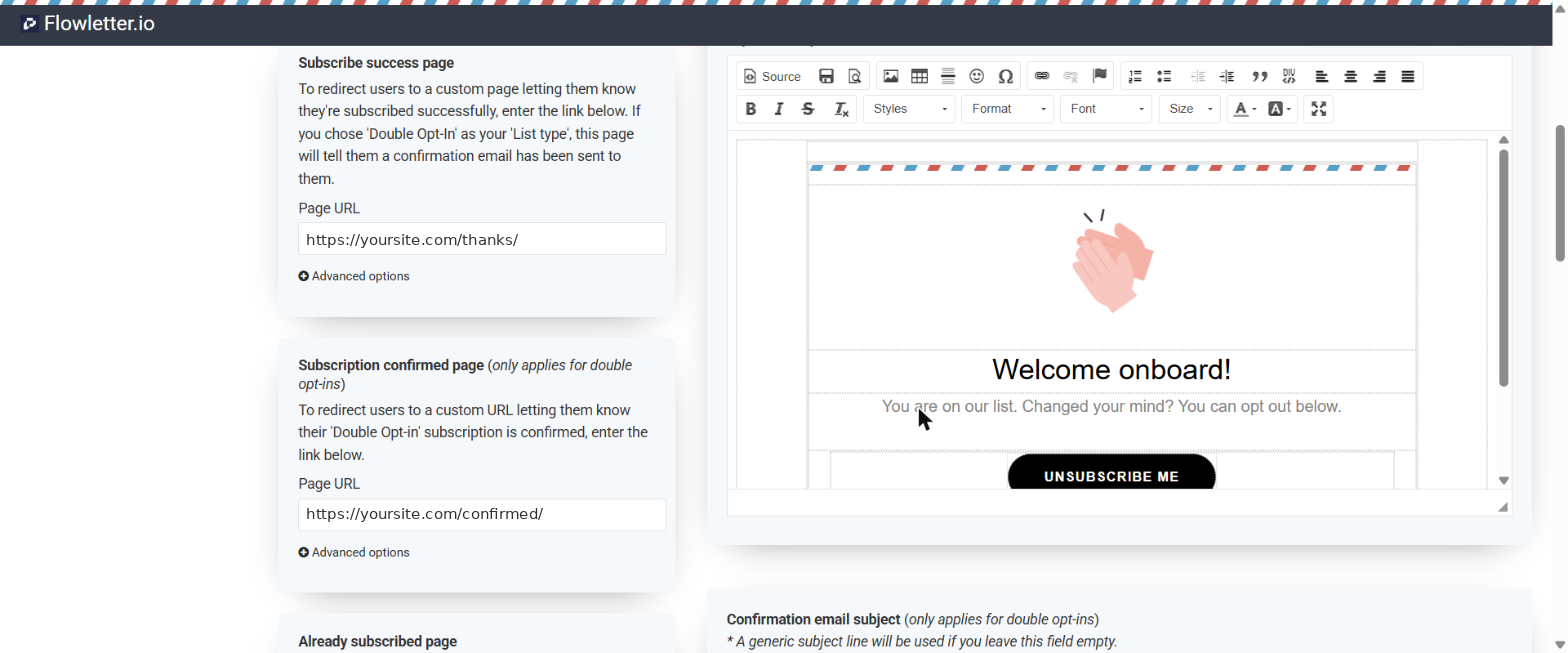
Subscribe success page - enter the URL of a page on your website to send people to after they subscribe. If you use double opt-in, this page should tell them to check their inbox for a confirmation email.
Subscription confirmed page (double opt-in only) - the page people see after they click the confirmation link.
Already subscribed page - the page people see if they sign up with an email that is already on the list.
GDPR reconsent success page and GDPR consent not given page - only needed if you use GDPR fields on your subscribe form or send reconsent campaigns.
Confirmation email subject and message (double opt-in only) - customize the confirmation email. If you leave these empty, a generic email is used. Make sure your message includes the [confirmation_link] tag.
Unsubscribe settings
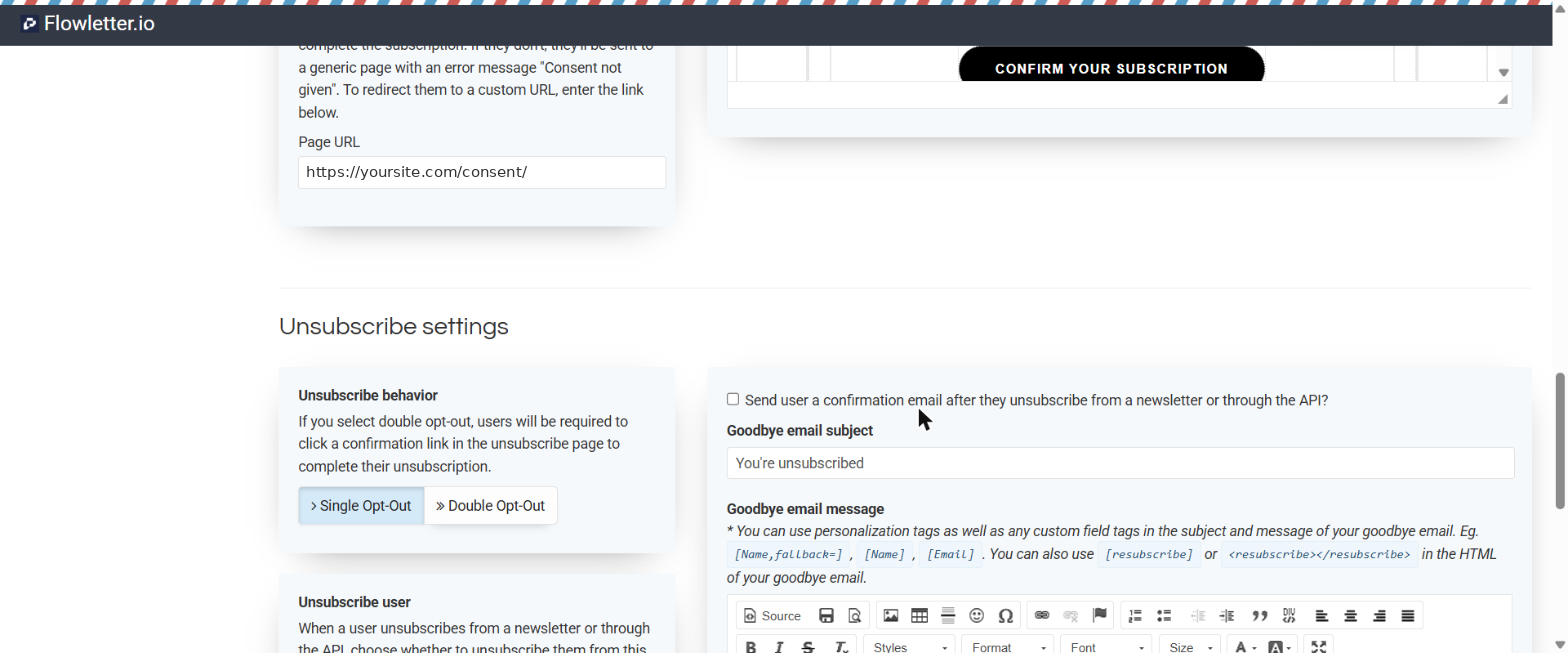
Unsubscribe behavior - with "Single Opt-Out" people are unsubscribed as soon as they click the unsubscribe link. With "Double Opt-Out" they need to confirm on the unsubscribe page.
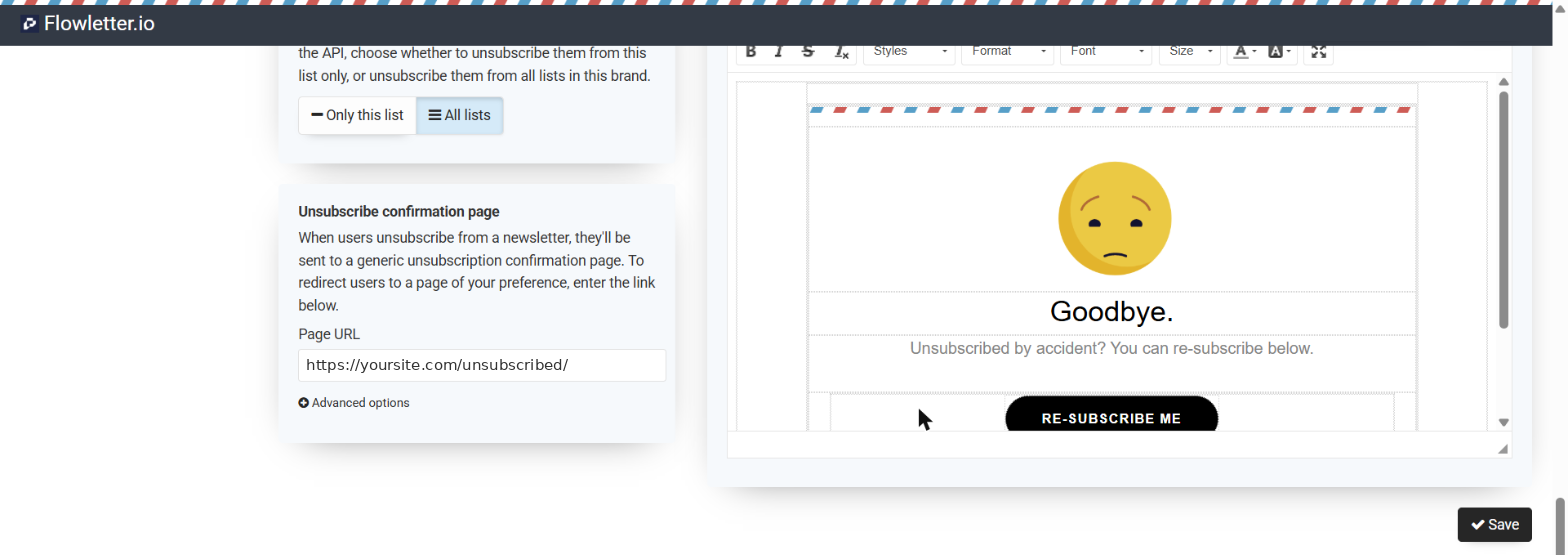
Unsubscribe user - choose "Only this list" to unsubscribe people from this list only, or "All lists" to unsubscribe them from every list in your account.
Unsubscribe confirmation page - enter the URL of a page on your website to send people to after they unsubscribe. If you leave this empty, a generic confirmation page is used.
Goodbye email - tick "Send user a confirmation email after they unsubscribe from a newsletter or through the API?" to send a goodbye email. You can include [resubscribe] so people can rejoin if they unsubscribed by mistake.
5) Don't forget to select "Save" at the bottom of the page.